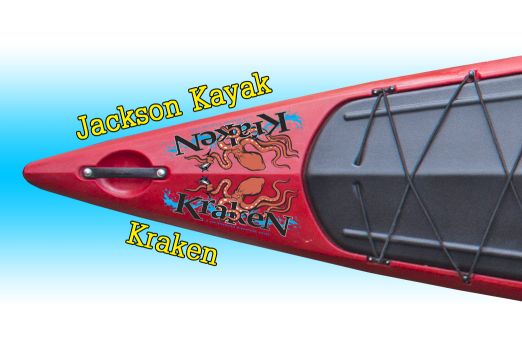
As the buzz on the internet in the kayak fishing world builds from anticipation of Jackson Kayaks new Fishing Platform most questions can be answered by watching the following videos and reading the following articles. Will you be the first one to own one?? The following are links that pertain to the Kraken from write ups about its design process to the reveal of the Kraken at the Outdoor Retailer Expo! Detailed walk through’s and Rigging ideas.

The Kraken is now available to order from your local dealer. See http://jacksonkayak.com/dealers/ to find a dealer near you!

Articles:

http://jacksonkayak.com/blog/2013/11/19/a-kraken-the-continuum/ http://www.rapidmedia.com/kayak-fishing/categories/1998-the-kraken-jim-sammons-new-jackson-kayak-design.html http://jacksonkayak.com/blog/2014/07/17/release-the-kraken-the-kraken-release/ http://jacksonkayak.com/blog/2014/08/02/the-birth-of-the-kraken/ http://www.kayakfishmag.com/news/kraken/

Jim Sammons own Kraken Rigging:

 https://www.facebook.com/jim.sammons1

Videos:

Yak Angler

Rapid Media

Jackson Kayak Kraken

http://jacksonkayak.com/jk-kayaks/kayak-fishing/kraken/

IMG_1428 IMG_1429Water, salt, dirt, and corrosion are the worst components for damaging your cable connectors.

Unlike a motor boat where the cable connectors are typically protected from most of the harsh weather conditions kayaks are completely exposed. Were out there taking waves over our bows landing on sandy beaches and constantly getting rained on.

For a small cost you can protect your cable connectors to obtain the maximum lifespan out of these expensive cables.

The  solution is simple.  Dielectric Grease and Caps that are designed to protect the IMG_1425patruding end of  a nut and bolt.

IMG_1426The result is a water tight protected Cable plug. To should still be careful  takes it from getting sand or other debris. The grease it will stick and make  a pretty big mess.

IMG_1393

You can find these screw protectors at your local hardware store. They come in different sizes so measure the cable end you would like to protect prior to purchasing them.

I put the dielectric grease on the female plug then place the cap over it. This added protection should prevent corrosion and extend the life of your electronics cables.


This new Electronics Battery Box will accommodate a large 12v 12Ah sealed battery.  Before drilling holes in a dry box make sure your box will fit through the hatch on your kayak.

Dimensions of the battery

Length 5.94 inches

Width 3.86 inches

Height 3.74 inches

Weight 7.95 lbs

You can find these batteries new on ebay for $20 – $30. The higher amp hour is good for running fish finder chart plotter combos with color screens. These use a higher amount of amps than the black & white units the 7.5 Ah batteries just don’t perform as well for a full day of fishing.

PArts

List of Materials:


box with batt

Tools:

  • Drill
  • Heat Gun
  • Wire Crimps/Strippers
  • Drill bits/ Step Drill Bit


Install: 

wiringUsing pipe insulation fit the battery to the box. This will hold the battery in place so it doesn’t bounce around. Next drill a pilot hole using a 1/8″ drill bit. This will be the location of the cable penetration. You can pick pretty much any side. I would say avoid the top the bottom and the back. In this install I opted for the front under the handle. Once the pilot hole is drilled use the step drill bit to ream out the hole until the cable gland will thread in.


Once the cable gland is installed slide the cable with the connector through from the exterior. You will now pick 2 wires from the 4 to pair.  Use the two inline heat shrink connectors Crimp and heat the one side to seal. Now slide over the 3 inch piece of adhesive heat shrink tube. Connect the inline fuse wire and the ground wire. Attach the terminal ends and your DIY waterproof electronics battery box is complete.


batt box finished

Waterproof Battery Box Modifications & Upgrades <— Click for updated post!!!!


Page 6 of 12« First...4567810...Last »