Upon the limitations from testing other keel guard products it was time to search for a better solution to protect my kayak.  A keel guard is to protect the bow and stern of your kayak from damage due to landing, dragging, or loading and unloading. It can also protect against submerged objects such as rocks and oyster bars. Gator Patch Kayak Keel Protection and Repair seemed like a great solution!
Searching for products commonly used on boats I ran across Gator Guards. This company offers a product Gator Patch Kayak Keel Protection. As we all know plastic is a tough material attempting get things to stick permanently. Especially in the case of protection materials that are constantly being scraped across surfaces with the entire weight of the boat on. Gator Patch seems to be a unique material that may hold up to the daily abuse us kayak angler have to throw at it.
About:
Gator Guards an American Company based in Farmington, Illinois offers many diverse products for protecting many different areas of boats. They manufacture products for protection from the keel to the deck of boats. Their products have been effectively protecting boats for over 20 years. All of the products Gator Guards produces are manufactured in the USA. This article focuses on the Gator Patch product.
 Gator Patch:
Gator Patch Kayak Keel Protection material is comprised of a UV core fiberglass reinforced polyester. One side has adhesive to apply to the area you would like to protect or repair. The patch will protect flat, curved, dented, angled and, joint areas. It is able to repair damage such as scuffs gouges cracks and also holes. It can be sanded and painted if desired.
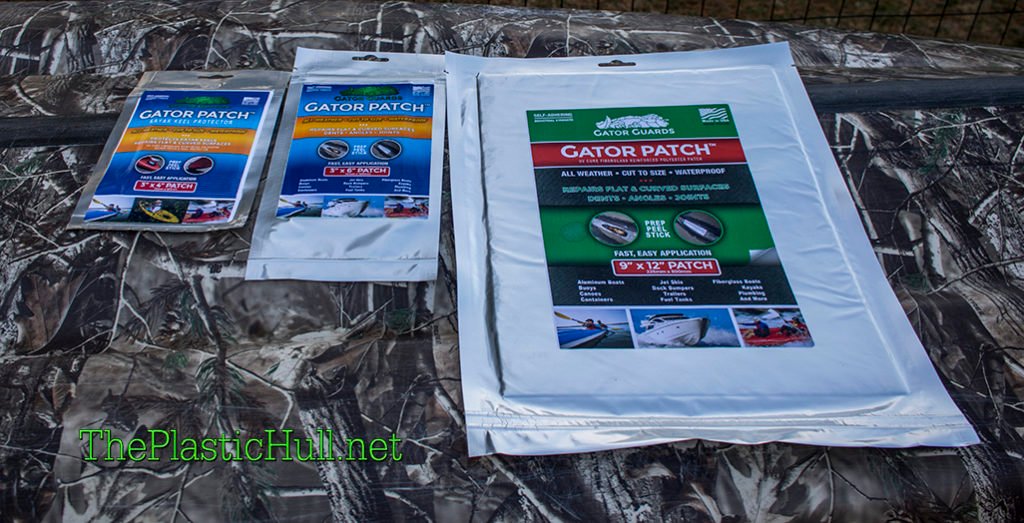
Gator patch is available in three different sizes.
Gator Patch can be cut to any desired size. Cutting should be done indoors out of UV light. UV light cured the product quickly in sunlight.
Application:
Gator patch is easy to apply.
 With a coarse grit sand paper scuff up the area with a crosshatch or X pattern. This will create a better surface for Gator Guard to adhere to. Wipe down with a clean rag and 70% isopropyl rubbing alcohol. Let the area dry.
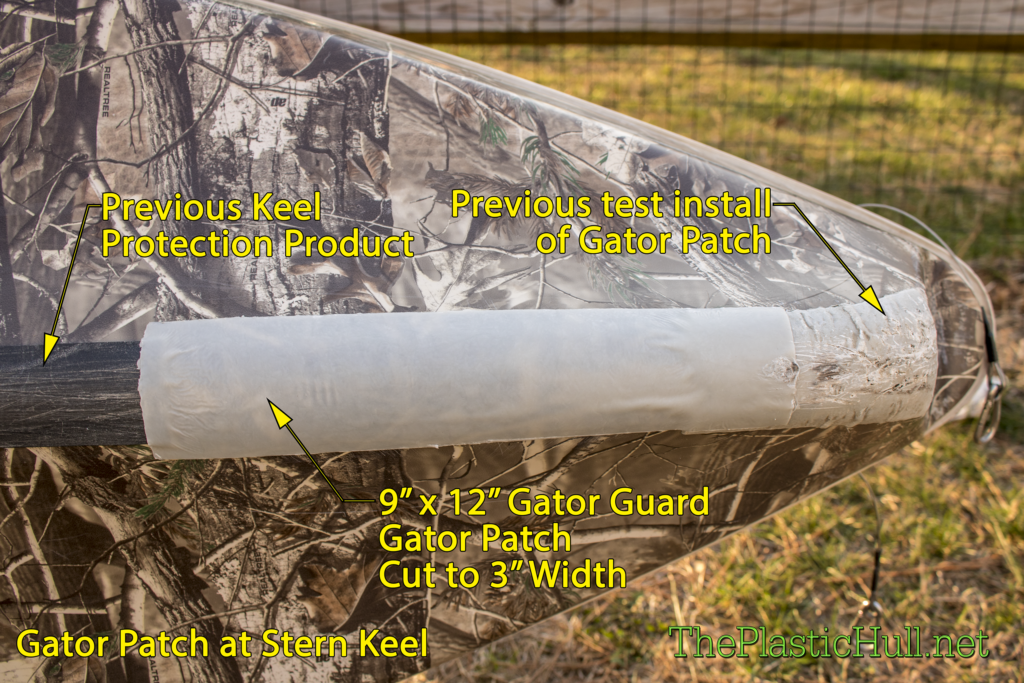
The 9″ x 12″ size is the best product for a keel guard. You can cut it 3 strips 3″ x 12″.
Cut the Gator Guard to the desired shape and size indoors. To apply the patch simply peel off the white backing to expose the adhesive. Place the Gator Guard on the area of repair or protection. Mold it to the shape by pressing down to remove bumps and air bubbles. You can use a roller tool or a simple 3/4″ socket wrench. Remove the clear film and let stand outdoors exposed to the sunlight or sky on a cloudy day.
Cure times will vary due to geographical locations and weather conditions. The curing process should take a maximum time of up to an hour. If preferred you can then sand and paint the patch or keel guard to match the hull of your kayak!
Review:

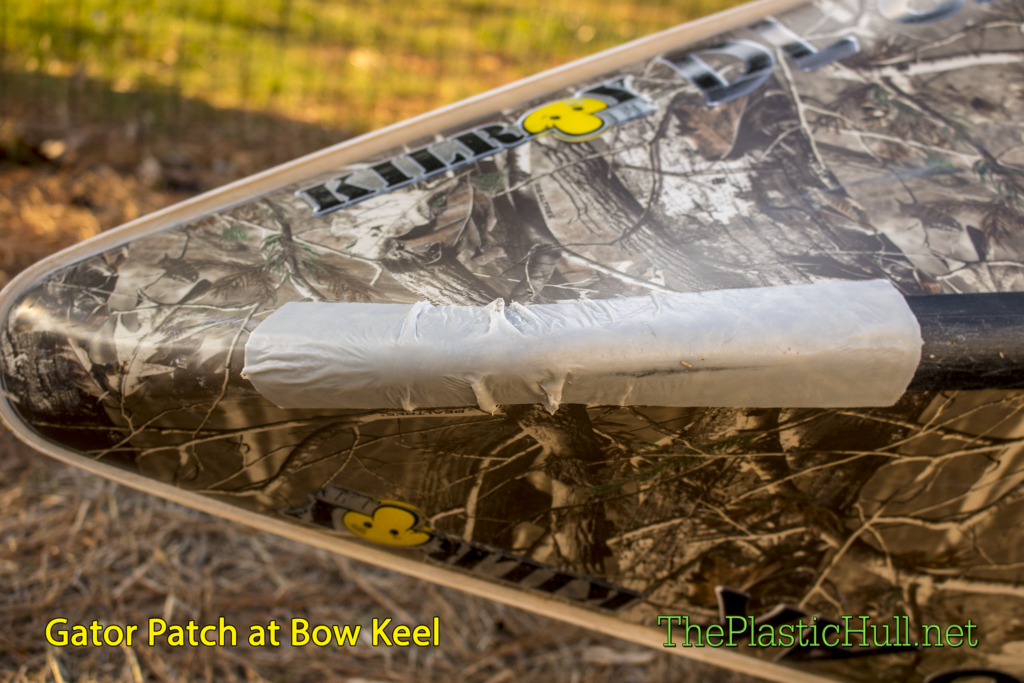
I installed a small patch on the keel of my kayak a few weeks ago. The curing process didn’t complete due to my application as the sun was setting. However I went fishing the next morning and the patch was hardened but not completely. The water did not effect the patch at all. It fully cured in the sun on the drive home and is now very rigid. Since then I have dropped and loaded the kayak from my truck 3 times and the guard is a little scuffed but is doing exactly what it was intended to do protecting my kayaks keel!
You may order this product directly from www.gator-guards.com
Or from amazon.com at the following links!


Gator Patch GP 3″x6″ UV Cure Fiberglass Reinforced Polyester Patch


Gator Patch GP 6″x9″ UV Cure Fiberglass Reinforced Polyester Patch


Gator Patch GP 9″x12″ UV Cure Fiberglass Reinforced Polyester Patch
https://www.gator-guards.com/gator-patch/
 The update Installs Lowrance FishReveal software. This enables the ability to display 200kHz broadband overlay within 455/800kHz down scan on the Elite 5Ti. The update also allows CHIRP pulse scan overlay on the HDS Carbon and Gen3 Units. A feature that was not available previously. Previously you could only overlay downscan imaging on the 2D display, but this option did not show nearly as much detail. This update on the HDS Carbon and Gen3 models enables a clearer image utilizing the CHIRP sonar frequency. There are also new color palettes available for the HDS Carbon only.
 Also with this update is a new C-MAP version which are an upgrade to Lowrance’s Base Chart Maps. It allows for better plotting and routing to the way point at the shortest and safest distance. This can be used with Navionics also. As kayak anglers we tend not to plot courses very often. This new feature isn’t really an advantage for us.


