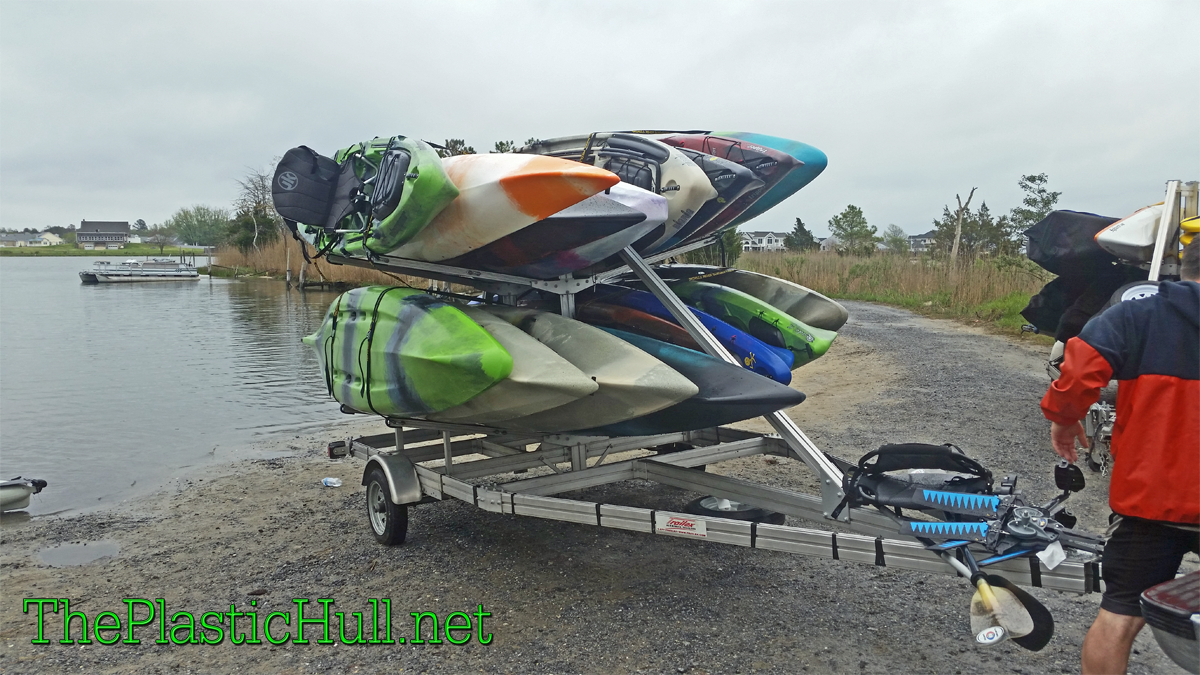
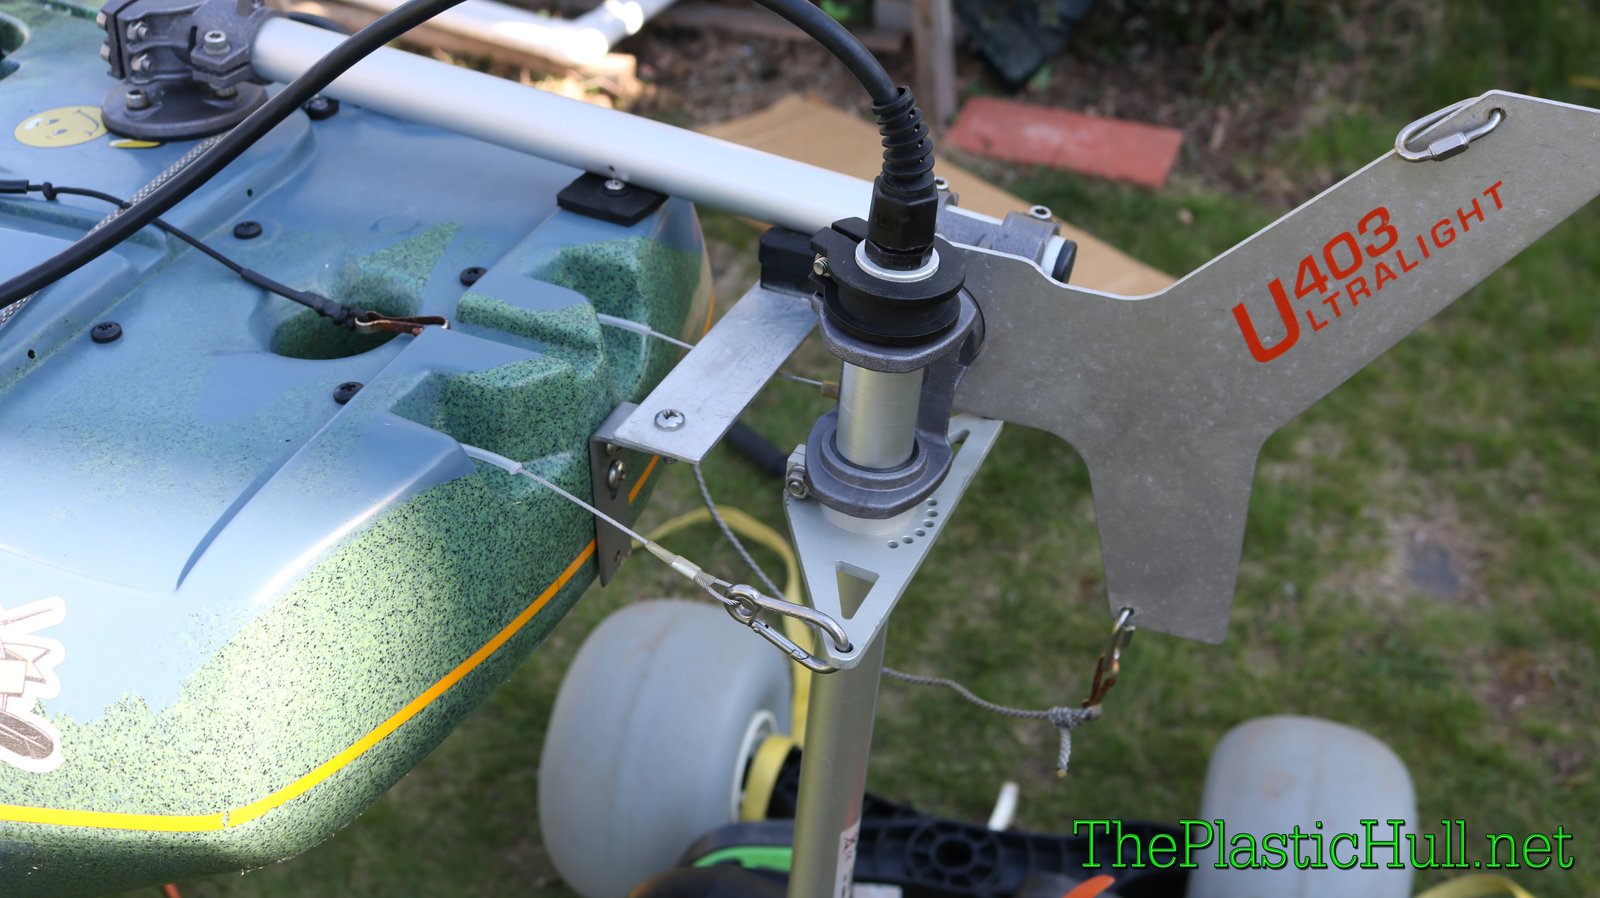
Torqeedo Steering Bracket Relocation – Jackson Big Rig
Over time new ideas arise on how to finalize a seamless install for the Torqeedo Ultralight 403 Electric Motor Installed on the Big Rig. Reviewing photos of a similar an install on another boat which flipped the steering bracket lower on shaft of the motor seemed like the best option enabling the motor to use the stock factory “Rudder Ready” cable tubing locations. It made sense and why I hadn’t come up with it previously no one will ever know.
I do recommend this to be the final steering modification for the Jackson Kayak Big Rig steering system for the Torqeedo UL 403.
In the case of my trial installs and with the learning as you go mentality, the modified steering cable install will require a total overhaul to relocate the steering bracket and steering cable locations. The modification will allow the use of the factory “Rudder Ready” locations so the relocation of the tubing is not necessary on the initial install.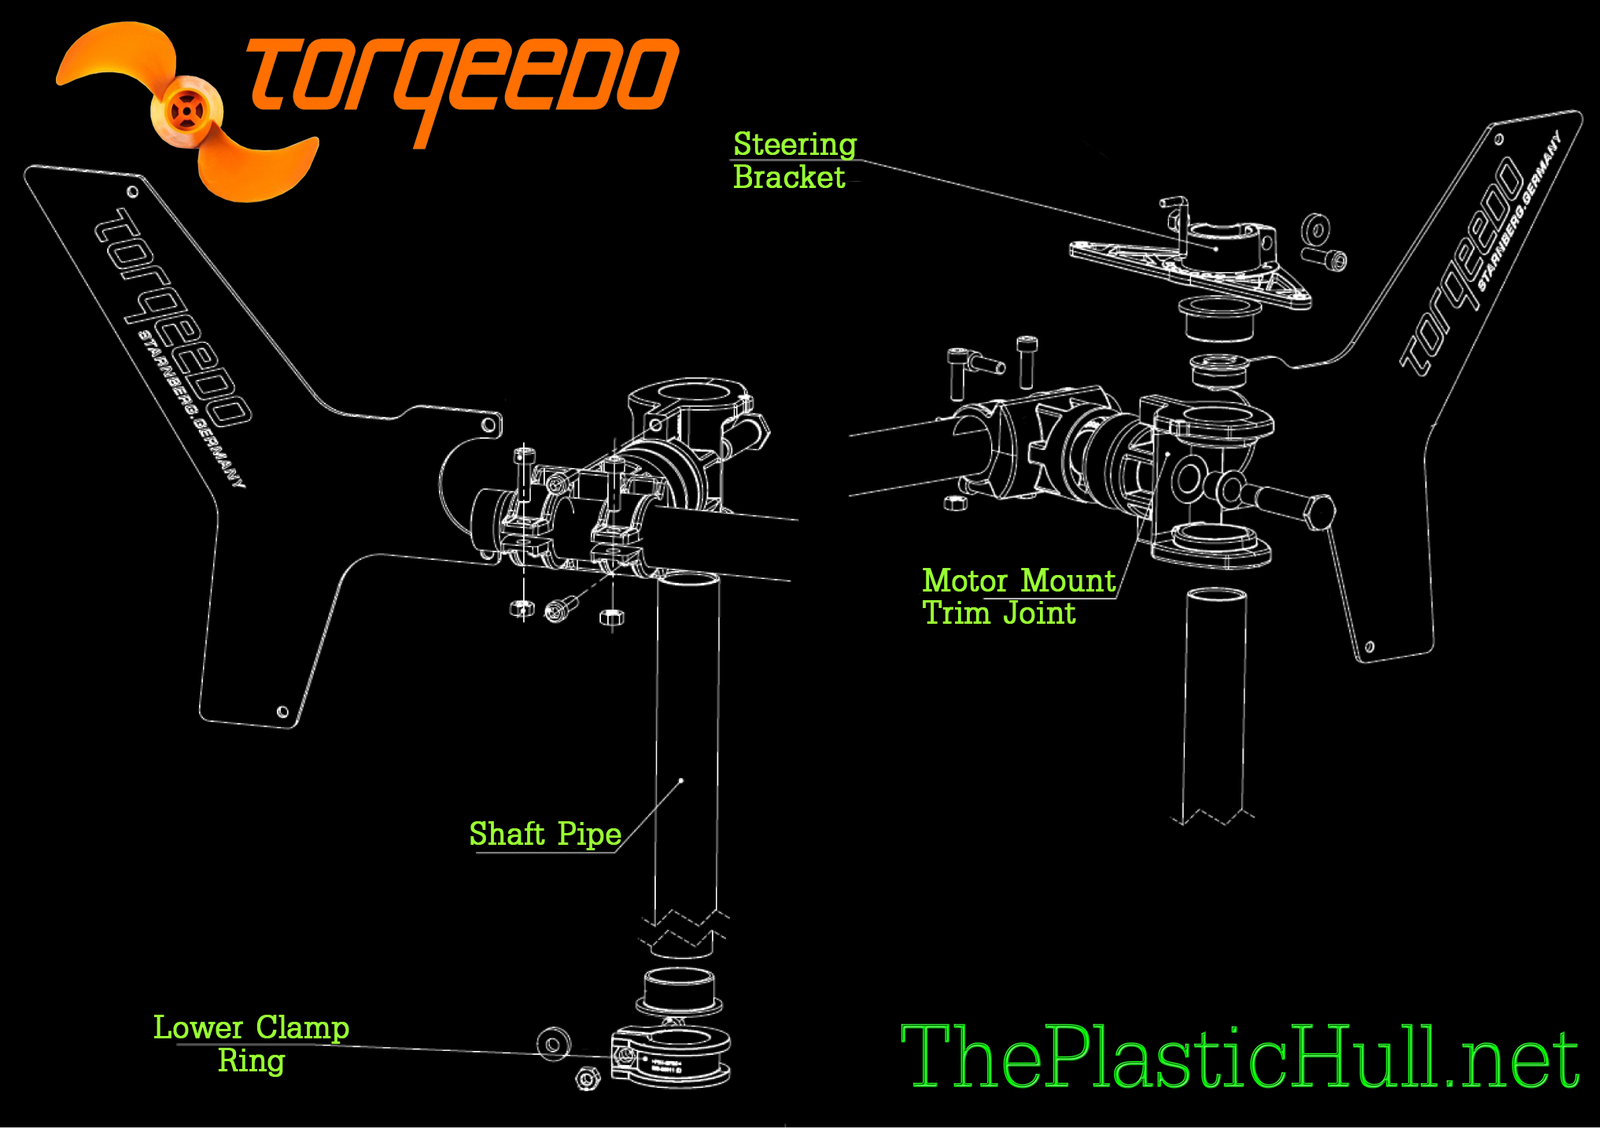
Tools Needed:
Needle Nose Pliers
Diagonal Wire Cutters
Flat Pliers (for Crimping Swedges)
Scissors
Hex Keys for aligning Tru-Course Pedals
Materials Needed:
(1) Jackson Kayak Rudder Tubing Kit
(1) Jackson Kayak Rudder Cable Kit
Heat Shrink Tubing with Adhesive
4 Swedges
(2) Snap Hooks (Reused)
Bike Chain Lube
Step 1 :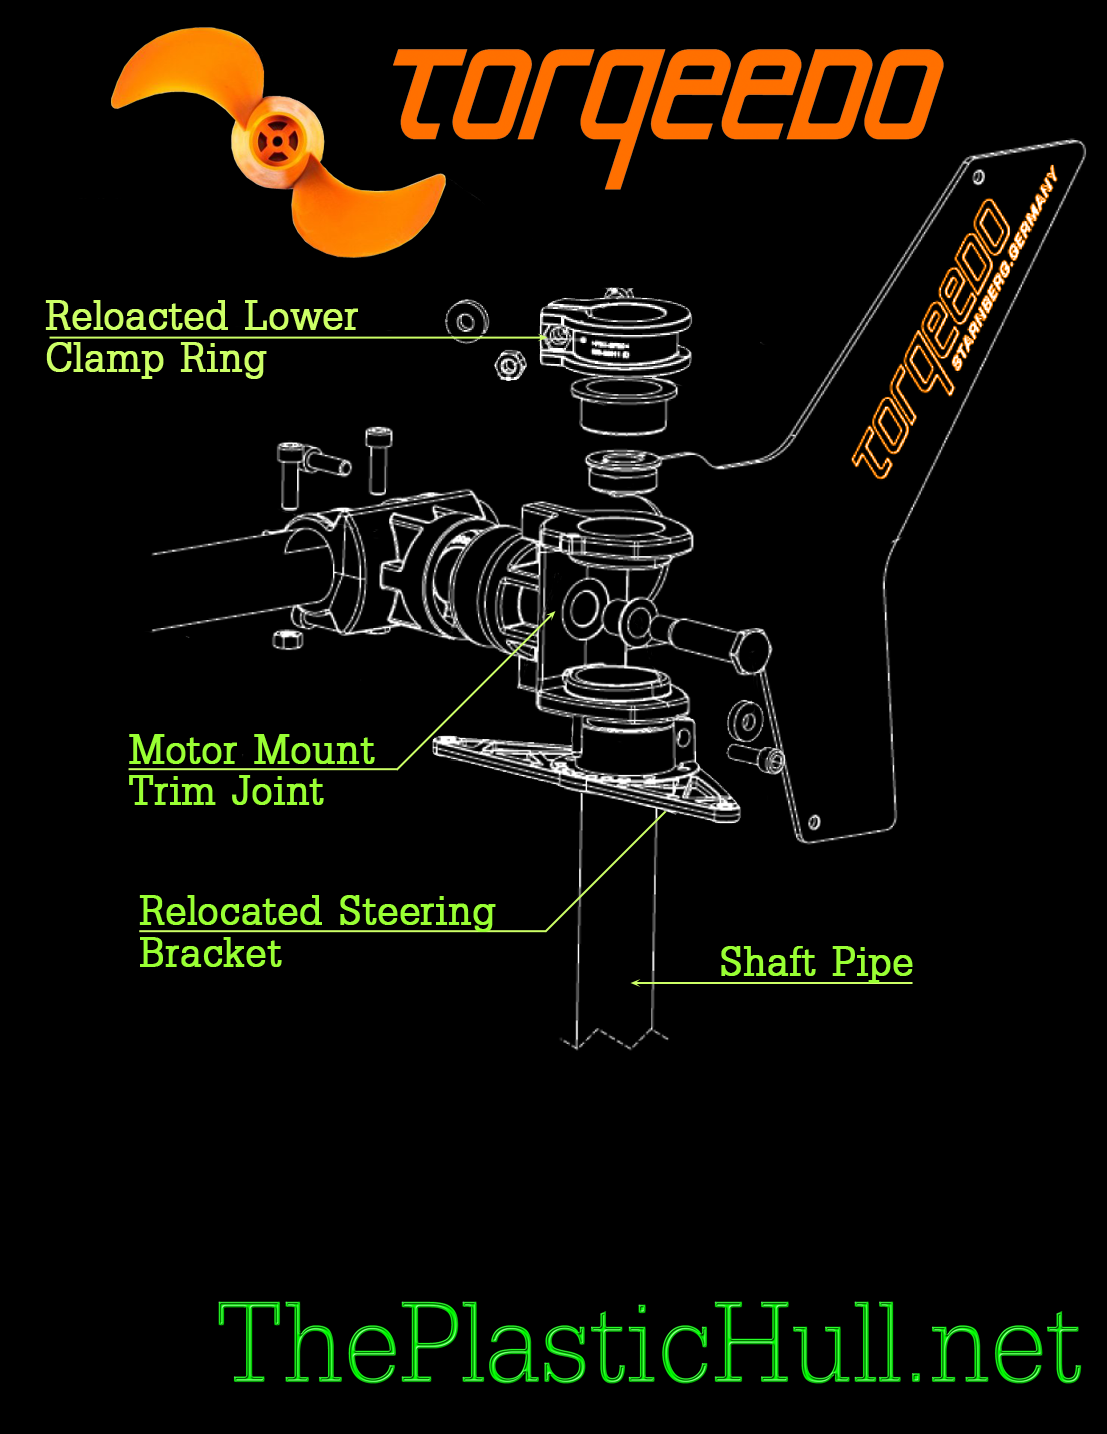
 Changing the steering bracket location on the Torqeedo Ultralight 403 is pretty simple. Remove the triangular clamp ring or Steering Bracket from the top of the motor sliding it off of the shaft pipe and power cable. Remove the (joint) mount/trim bracket. Remove the lower clamp ring. Now slide the Steering Bracket on the power/control cable then onto the shaft so the steering brace or clamp ring faces up. Slide the (joint) mount/trim bracket back onto the shaft as it was. Then the lower Clamp ring last so it will be on top.
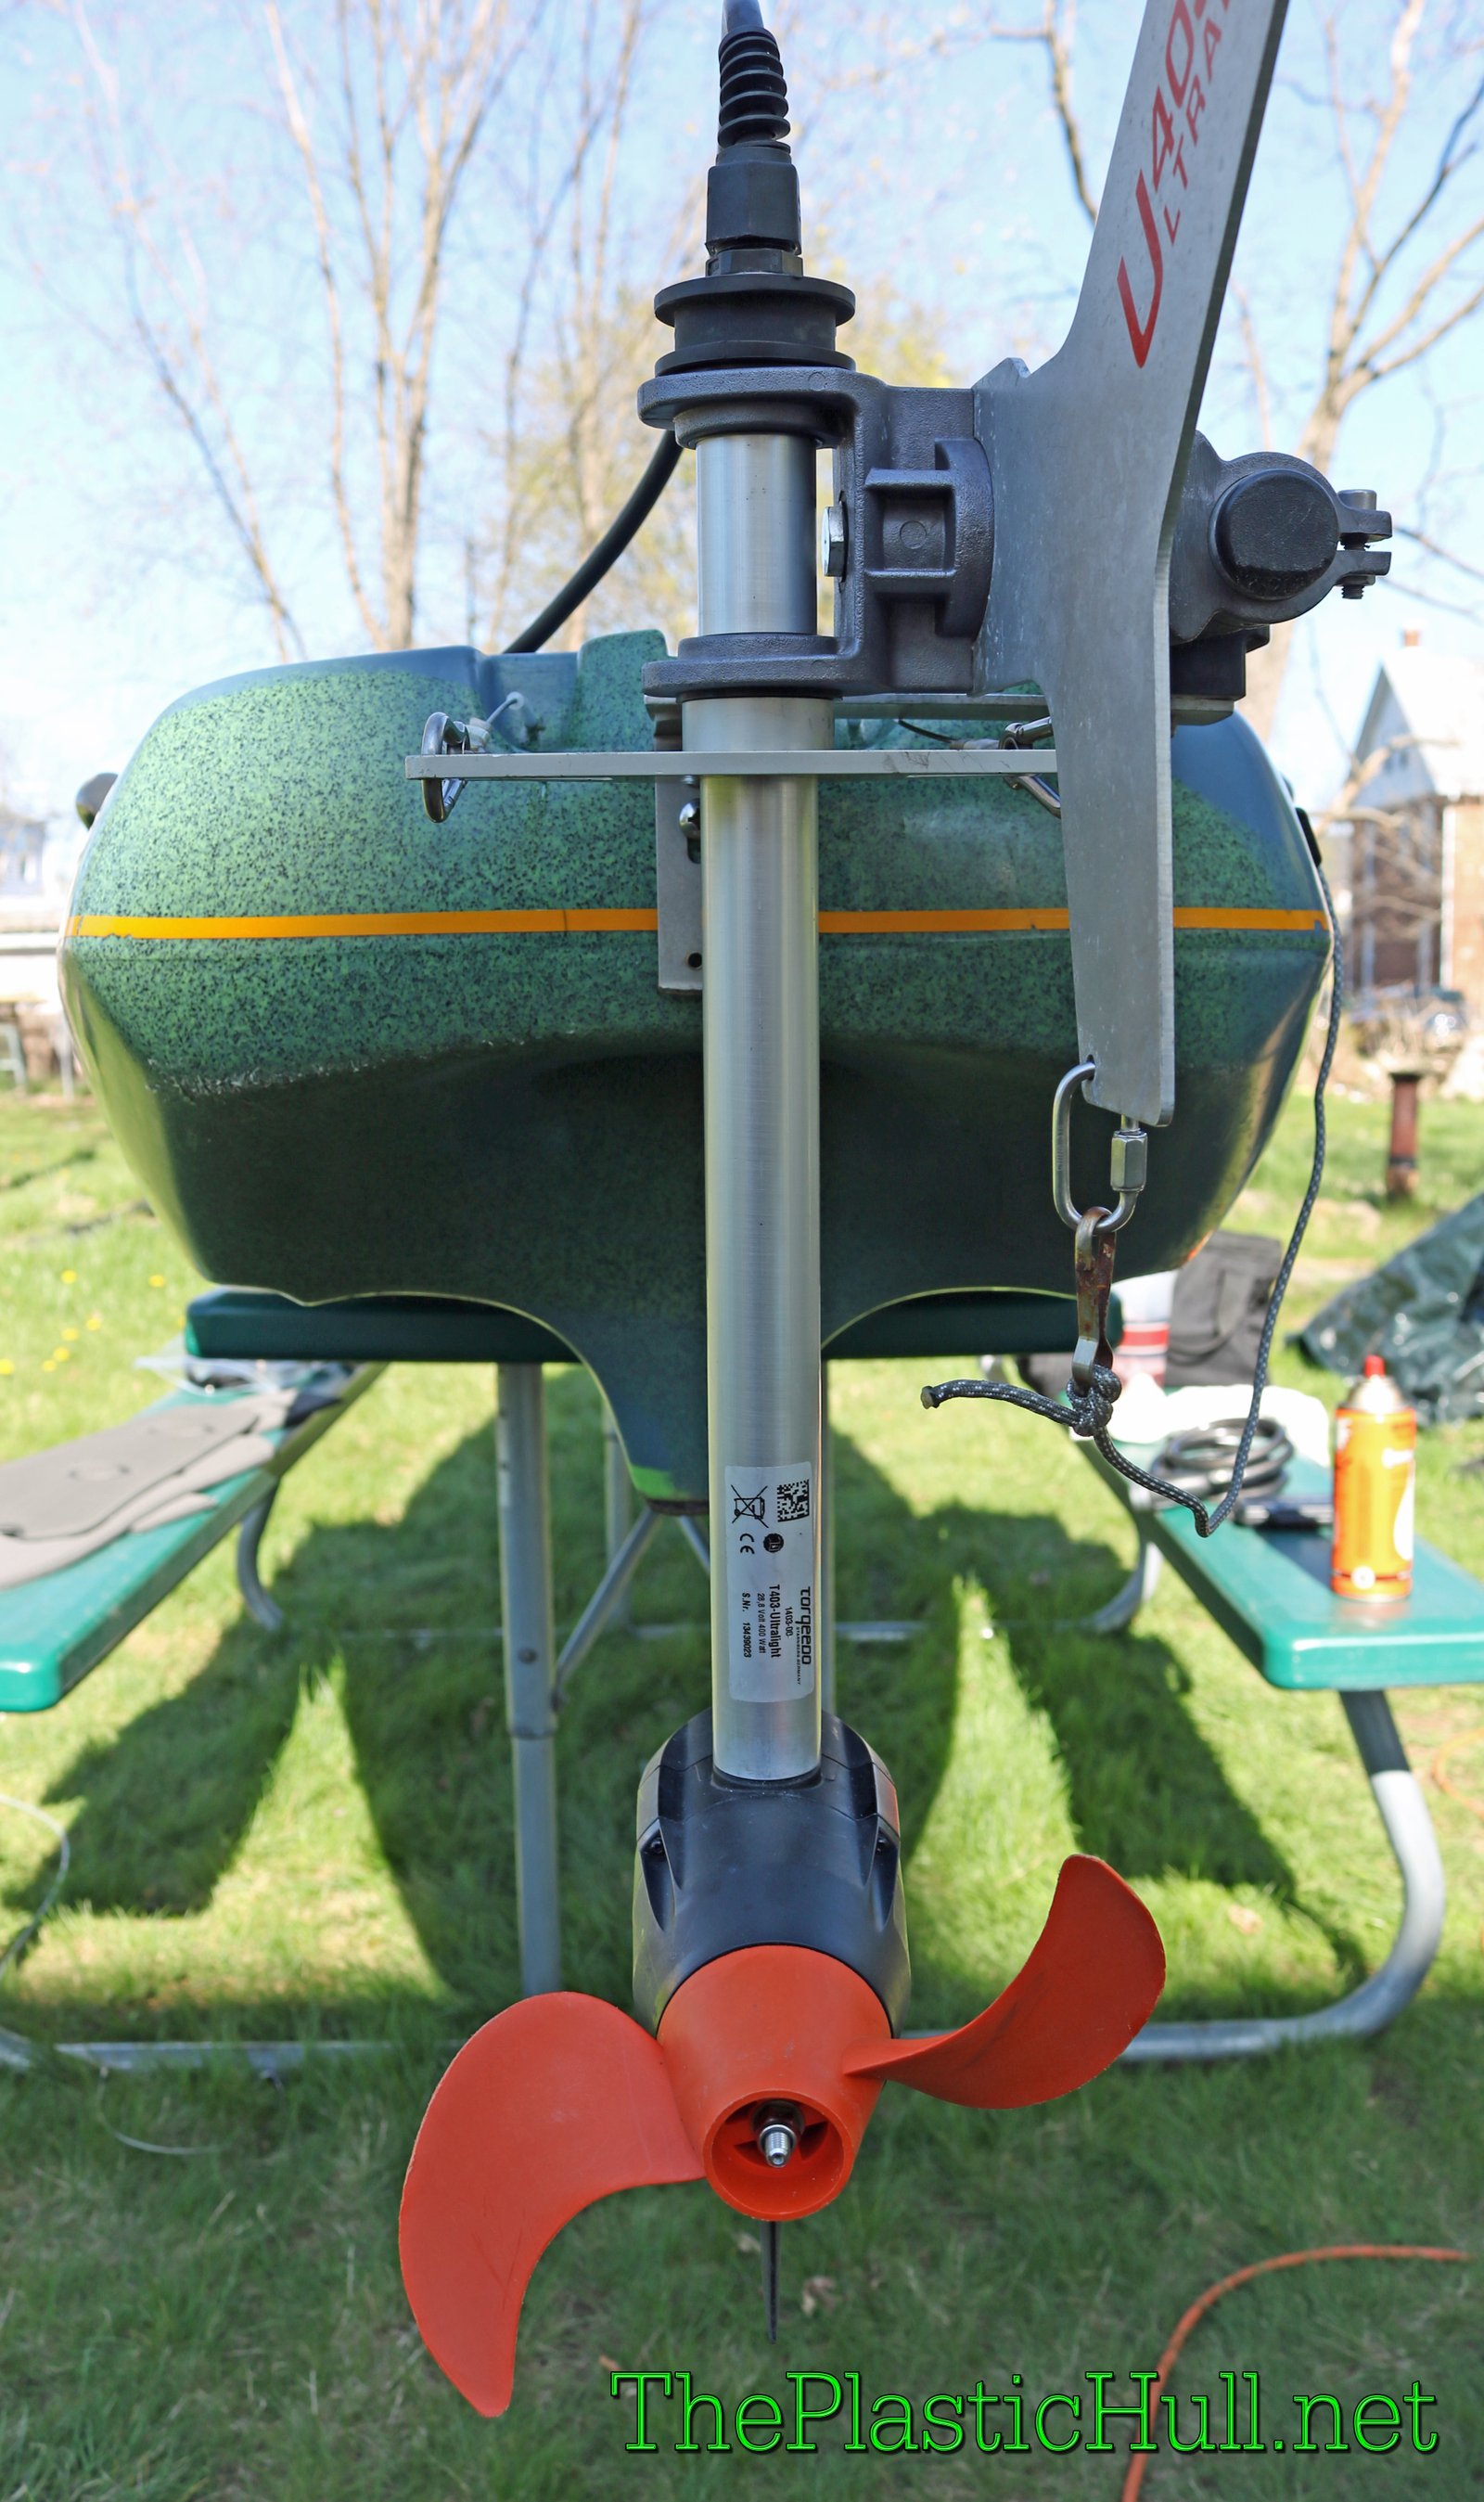
Tighten the lower ring clamp at the top of the Shaft pipe. While holding the motor straight with the steering bracket tighten on center. The Shaft pipe should not slide up or down at this point. The steering bracket is now reversed to the bottom and the clamp ring to the top. now affix the motor to the boom on the kayak.
If your kayak is stock “Rudder Ready” from Jackson simply skip to Step 4. If using the Jackson Rudder Kit Follow JK instructions for running cables through tubing and footrace upgrade. However I would advise using the Sea-lect Designs Tru-Course foot braces for the install as described in this modification as installed and here as how to install the Sea-lect Designs Foot Braces.
 Step 2:
If you are reversing the original installation you will now cut the cable from the foot brace. Prior to removing the old cable and tubing slide the new tubing on the exposed cable. Now feed the old and new tubing through the hole that the existing cable was run through. This will allow you to guide the new cable to the stern of the boat without the hassle of reaching from the stern hatch to grasp the new tubing. Leaving about 12″ or tubing exposed at the foot brace repeat on the opposite side.
Step 3:
Now at the stern remove the old cable and tubing from the wire holders under the deck. Cut off the snap hooks from the existing cable. Set the snap hooks aside as you will be reusing them.
Cut the new cable ends to a point. Using the new cable feed though the hole from the exterior of the kayak and through the new tubing. This should center the tubing on the hole. The tubing is the exact same diameter as the hole. Once you get the point through the hole from the inside of the hull to the outside of the stern use the needle nose pliers to pull the tubing through. Cut off the point flush and using a lighter and the needle nose crimp the tubing an inch down and burn the end. This will create a flange terminating the tubing disallowing it to pass back through the hole.
Step: 4
Using the bike chain oil put a few drops into the new tubing at the foot brace or stern of the kayak. Run the new cable starting from the foot brace or stern. I have always ran my cables from the stern to the bow but have found it may be easier to run from the foot brace back to the stern. Once the cable is run terminate the end at to e foot brace first. This will eliminate the guesswork if the motor is on center or not. Place hex keys into the small hole in the Tru-Course foot brace. This will hold the pedals in the upright ‘centered’ position.
Step 5:
Now using the snap hook clipping them to the steering bracket. Run a about 1″ of heat shrink tubing then a swedge on the cable and make a loop through the snap hook eye with the cable. Run the end through the swedge crimp when taught and the motor steering bracket and motor is centered. Repeat on the opposite side.
Installing hardware may cause damage and/or void manufacturer warranties. ThePlasticHull.net its authors or any other source of information on this website is in no way responsible for your actions nor any type issues or damage that may occur. The information provided on this website is a free reference guide only. The authors of all information, sponsors and the owners of the website that host this information are not liable for any problems or issues that arise from the use of this information. Users of this information hereby acknowledge that all use of this information is done by their own free will, at their own sole risk, understanding that destruction of property, injury, or death could occur.