Last year I reran all of my kayak steering cables on the Big Rig for the Torqeedo. Instead of swaging the cable termination at the foot brace I used a 3/16″ wire rope clamp. The original clamps made it through the season, but galvanized steel had rusted and corroded in no time.
The reason for this upgrade was to grant the ability of leaving the steering cables fully adjustable and removable for maintenance. A wire rope clamp is a U-bolt with a saddle and 2 nuts. A wire rope clamp is used for clamping down on 2 strands of wire rope to securely form a loop. They range in all different sizes. For this application a 3/16″ clamp is best. To assemble, insert the end of wire rope into clip saddle loop back around and set the end inside the saddle under the U-Bolt and tighten nuts until secure.

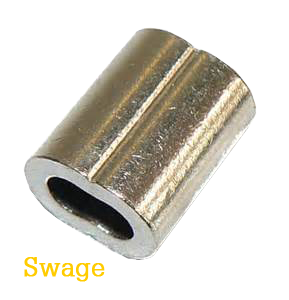
Previously using cable swages which permanently crimp to the cable and are only removed by cutting off. This made any sort of maintenance impossible without cutting the cable. Previously I was able to remove the swages using a Dremel tool precisely not to cut into the wire rope. This took time and was not ideal.

The new clamps pictured are stainless steel and should last much longer in the saltwater environment. The steel rope clamps are pretty inexpensive at around $1.50 to $2.00 apiece but can be purchased in bulk cheaper.

Waterproof Kayak Battery Box Mods & Upgrades

batt_box_finishedThis article illustrates how to modify and wire a 12V plug port and a USB receptacle for charging electronic devices such as cell phones and running GoPro’s with out an internal battery for an all day charge. Using the existing waterproof battery box from a previous article we will first replace the 12V 12 aH Sealed Lead Acid (SLA) Battery. See SLA or LFP Accessory Battery for your Kayak write up for the differences in batteries and pros/cons of both. I have opted to now use a LFP battery for its long list of great qualities.

Products & materials you will need.

Battery Box Wiring Diagram

Wiring Diagram 8X11

Instructions:


  • hole ocationsFirst thing you will do is remove the existing battery and all of the wiring in the box. We are going to replace everything inside. Keep the cable gland as it will be reused.
  • Using a hole saw drill match up the diameter to the outside of the hole saw with the two receptacles. Try to keep the holes even and equal distance apart for aesthetic reasons. After drilling the holes trim the excess from the edge of the holes. Set the receptacles and tighten the collar down.
  • Drill a hole using a hole saw that matches the diameter of the switch in your desired location. Make sure the internal protrusion will not interfere with the battery or the 12V receptacles. Install the switch.
  • battery box portsNow we will splice 2 wires together to connect the negative side and the positive sides of the receptacles together. Make one for each RED and BLACK.
  • Connect the spade connectors to the correct terminals on the receptacles + with + and – with -.


  • Using a butt connector connect the RED + wire from the Fish Finder Plug to one inline fuse.
  • Using the 3 Way Female to 2 Male connector connect the Two Inline Fuses to the Male ends and the White 12V Positive from the switch with a male spade to the female end on the 3 way its good to tape this connection with electrical tape or purchase a insulated connector.
  • Connect the Red + wire from the switch using a female spade connector to the battery.
  • battery box wiredConnect the BLACK – wires by crimping on a female spade connector from the 12V receptacles, the 12V Fish Finder connection and the black wire from the switch together. Simply twist the (3) wires together feed into the hole on the connector and crimp using the crimping tool.
  • Then Connect the Female Spade with the (3) black wires to the – Negative side of the battery.


Upon Completion:

Test by pressing the switch to the ON position. The LED Indicator should light up. Test all receptacles and that the fish finder powers up. You now have a portable waterproof kayak battery box with the option to run additional lighting on your kayak, Charge electronics, and run cameras VIA USB power.


This concludes the Kayak Battery Box modifications & Upgrades article. Please leave comments on your thoughts!