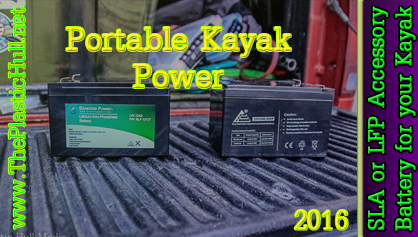
SLA or LFP Accessory Battery for your Kayak
 In a short period of time Fishing kayaks in most cases a single user vessel have begun using many of the electronics that power boats use. Portable power has become a necessity. Running Fish Finders on a battery pack of AA batteries is a thing of the past. In the present we have Fish Finder/Chart Plotter combos, kayak lighting, and the ability to charge battery powered devices while away from home is important.
Previously we built a waterproof battery box for a fish-finder/chart plotter. Since then there have been many advancements in batteries. This article explains the difference between the traditional Sealed Lead Acid Battery (SLA) and the latest Lithium-iron-phosphate battery (LFP). Here I list the pros and cons of both. You make the decision!
A SLA battery
SLA Battery Pros:
- Inexpensive (Economically Friendly)
- Fully Sealed Package
- Rechargeable
- Recyclable
SLA Battery Cons:
- Poor weight-to-energy (8 lbs 12aH)
- Cannot be stored in a discharged condition
- Inconstant discharge voltage
- Limited number of full discharge cycles
- Lifespan (300 charge cycles)
- Sulfation
- Memory
- Not Environmentally Friendly
- Contains Lead
 There are many cons to the SLA battery for use on a kayak the first being weight. The 12aH SLA will weigh in at 8 lbs. That’s a lot of weight to travel with on any kayak. Battery life is another issue you may get a season or two total out of the lifespan.
New and improved Lithium-iron-phosphate batteries (LiFePO4 or LFP) are slowly replacing Traditional SLA batteries. Although still pricey LFP batteries have many advantages over the previous generation technology of SLA’s.
LFP Battery Pros:
- Excellent Weight-to-energy (3.5 lbs 12aH)
- Very constant discharge voltage
- Low Discharge Rate compared to SLA
- Rechargeable
- No Memory (Can Be fully Discharged without cell damage)
- Lifespan (2000+ charge cycles 5-10+ years)
- Recyclable
- Thermal and chemical stable aka Safer (as opposed to Lithium Ion cells)
- No Environmental Thermal concerns (provides maximum output at hot or cold temps)
LiFePO4 Battery Cons:
- Cost (Expensive)
- Contains Phosphates
Looking forward to this conversion. Will report on the experience in the near future.


 Also take into consideration the factory installed battery box tray between the front day hatch and the center hatch (7). In my case the fish finder location is to be on the center hatch tracks and being fully adjustable to slide the entire length of the track. The decision to run the wired through the deck in front of the center hatch in my case was the conclusion. This location allows the wires to swing and not get int he way when operating the hatch. The next step will be fabricating a track mount console that will allow me to mount the fish finder to the center of the hatch.


 The best out of them all I have found for large connectors is the West Marine Wire Cap. Fish finder connectors with 1″ diameter will work with this cap to cover the required hole to pass through the wire for both the transducer and the power. You may run two wires at 14 gauge through this cap max and 1 wire at 8 gauge id say max.